Today I had a realization. Not a big philosophical one like “What is the meaning of life?” or “Why do socks disappear in the dryer?” No. This one was even more important.
Why do people make tiramisu so complicated?
Every recipe online sounds like you need an Italian grandmother, a culinary degree, and a spiritual connection to espresso beans. Meanwhile I'm standing in my kitchen thinking:
"I just want dessert… not a graduate thesis."
Then I discovered the easiest tiramisu recipe ever, and honestly it changed my relationship with dessert forever. No complicated custards. No separating eggs like you're performing surgery. No mysterious techniques that require whispering to mascarpone cheese under a full moon.
Nope.
Just Cool Whip, cream cheese, lady fingers, coffee, and cocoa powder.
That's it.
And when I made it, I stared at it in disbelief like:
"Wait… that's tiramisu? Did I just accidentally become fancy?"
So today I’m sharing the simplest tiramisu you will ever make in your life. If you can stack things and mix things, congratulations — you are now qualified.
Let’s do this.
What Is Tiramisu?
Before we dive into the lazy-girl version, let’s talk about what tiramisu actually is.
Tiramisu is a famous Italian dessert made with layers of coffee-soaked cookies and creamy filling, usually topped with cocoa powder. The name “tiramisu” literally means “pick me up.”
Which makes sense because:
• It contains coffee ☕
• It contains sugar 🍰
• It contains happiness 😌
Traditional tiramisu is made with mascarpone cheese, eggs, sugar, espresso, and ladyfinger cookies. It's rich, creamy, fluffy, and quite addicting.
But here’s the thing.
People often overcomplicate it.
Like life.
We turn something simple into a 12-step process with emotional damage and three dirty mixing bowls.
But this recipe? Oh no.
This recipe says:
"Relax. Life is hard enough already."
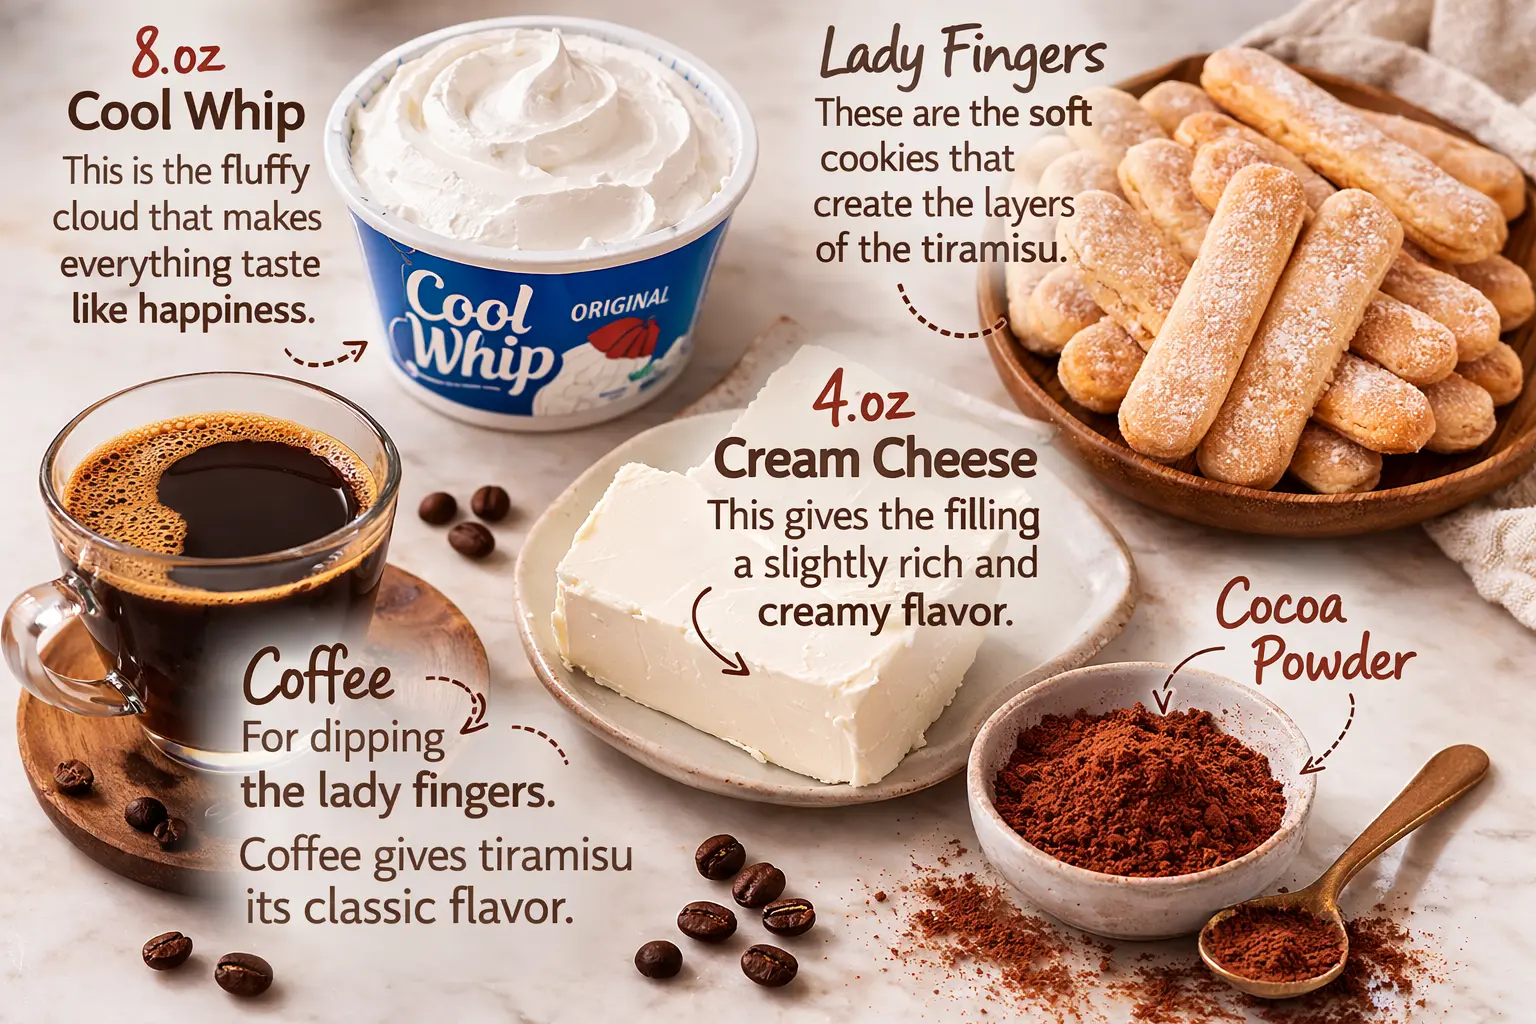
Ingredients
Here’s the best part.
The ingredient list is so short it feels illegal.
You only need:
1. 8 oz Cool Whip
This is the fluffy cloud that makes everything taste like happiness.
2. 4 oz Cream Cheese
This gives the filling a slightly rich and creamy flavor.
3. Lady Fingers
These are the soft cookies that create the layers of the tiramisu.
4. Coffee
For dipping the lady fingers. Coffee gives tiramisu its classic flavor.
5. Cocoa Powder
The magical finishing touch that makes it look like a dessert from a fancy restaurant.
That's it.
I’ve seen smoothie recipes with more ingredients.
Step-by-Step Instructions
Now let’s make this ridiculously easy tiramisu.
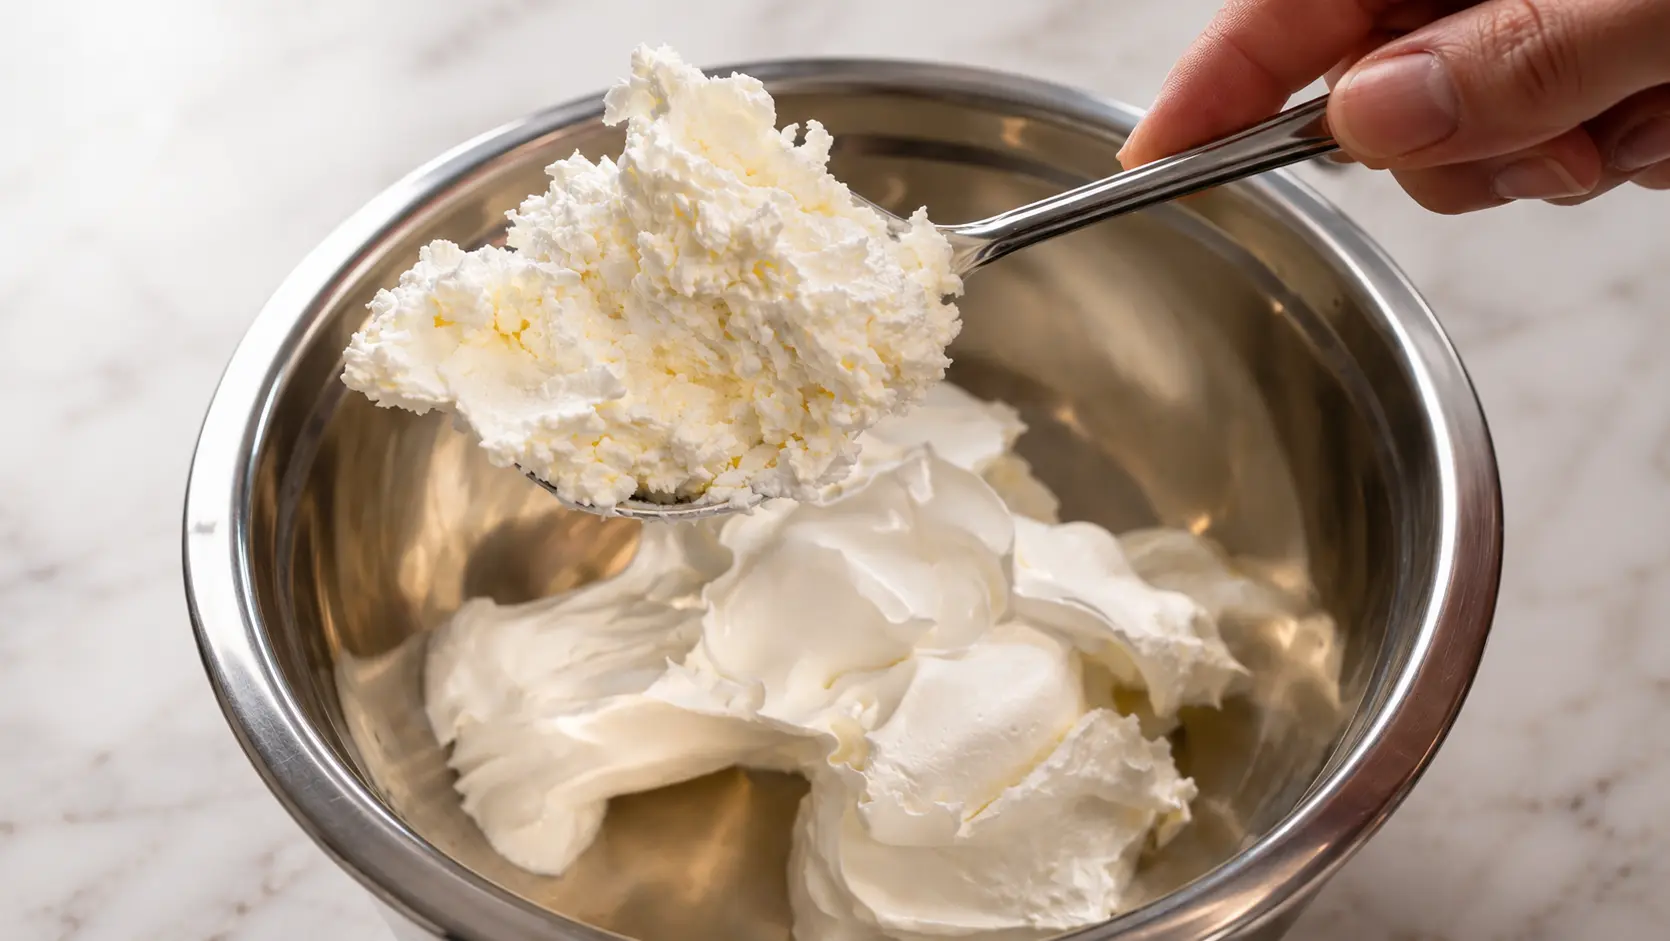
Step 1: Make the Creamy Filling
First, grab a bowl.
Add:
• 8 oz Cool Whip
• 4 oz cream cheese
Now mix them together until smooth.
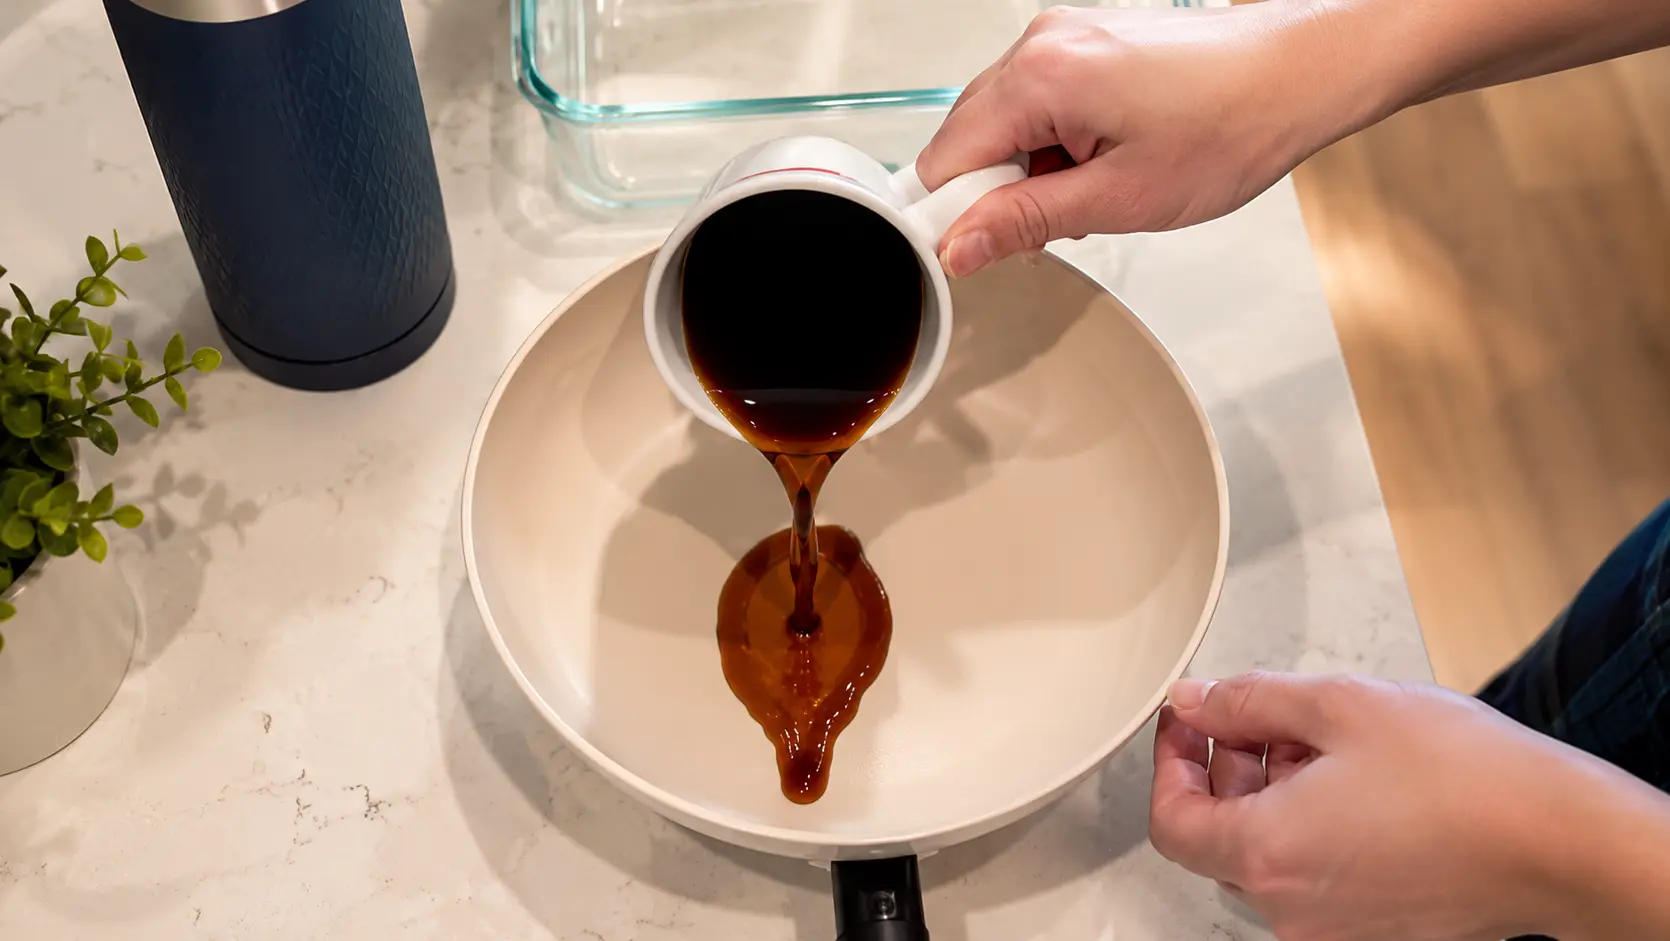
Step 2: Prepare the Coffee
Brew some coffee and let it cool slightly.
You don’t want it boiling hot because we’re dipping cookies, not cooking pasta.
The coffee gives the dessert its classic tiramisu flavor.
Also, the smell alone will make you feel like you're in a tiny café somewhere in Italy.
Or maybe just your kitchen.
But emotionally it's Italy.
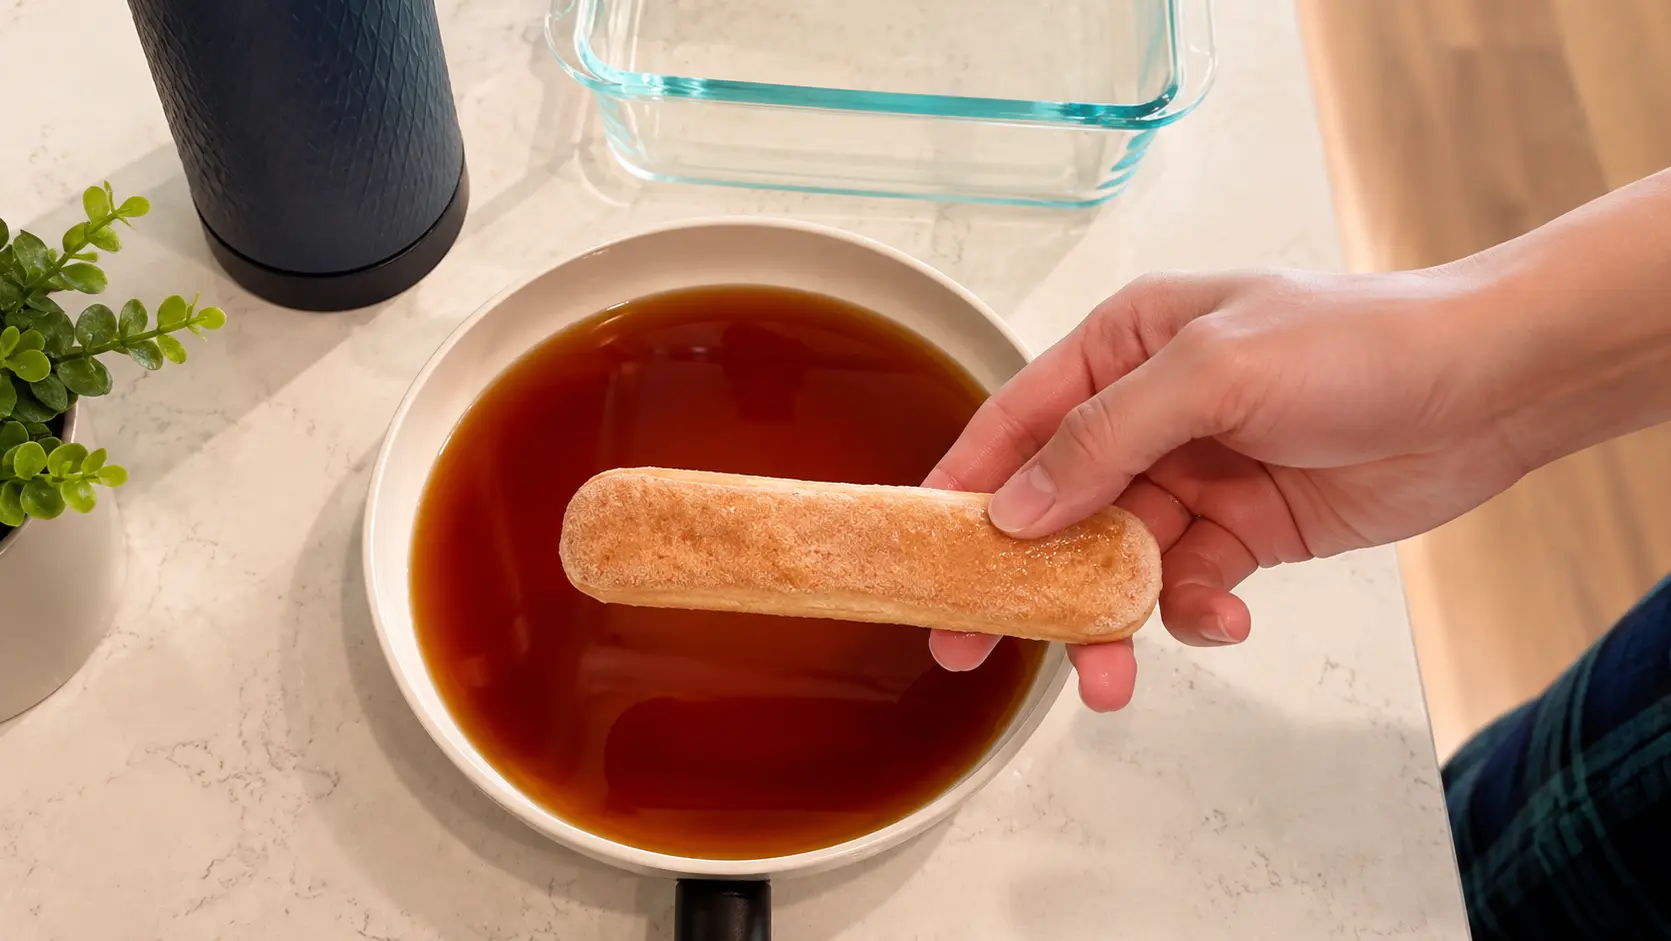
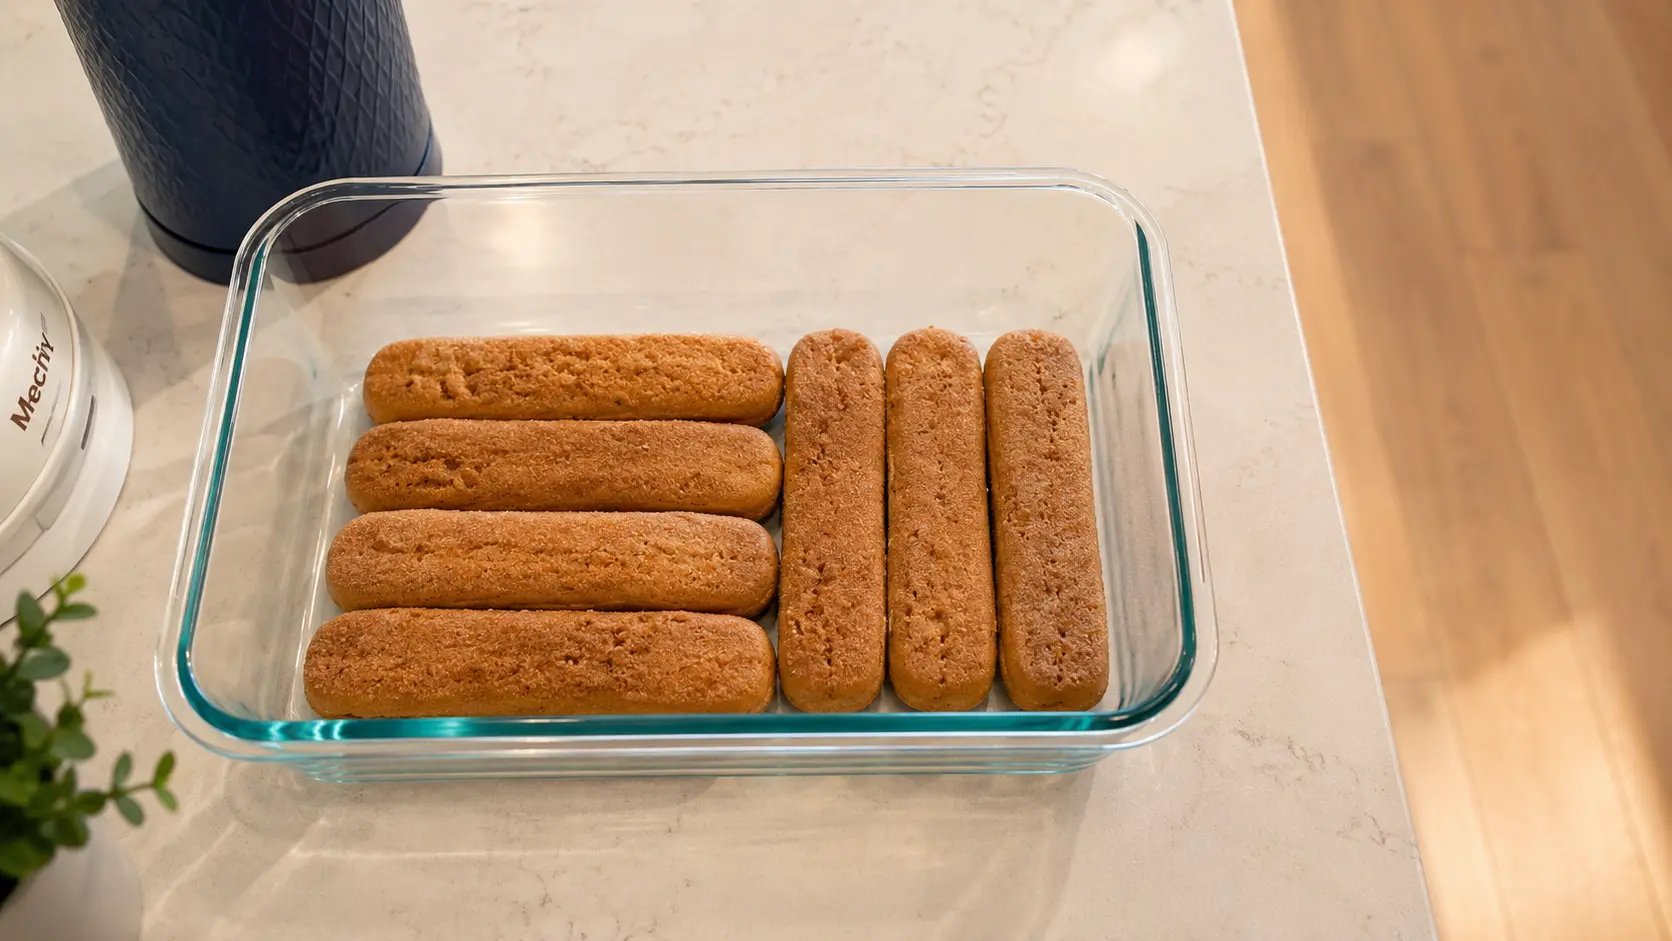
Step 3: Dip the Lady Fingers
Take the lady fingers and dip them into the coffee.
Quick dip. Not a long bath.
If you soak them too long they will fall apart and become cookie soup.
We are making tiramisu, not tragedy.
Step 4: Build the First Layer
Place the dipped lady fingers in a dish.
Line them up side by side like little coffee soldiers.
This forms the first layer of your tiramisu.
Already it looks impressive.
Which is funny because you’ve done about four minutes of work.
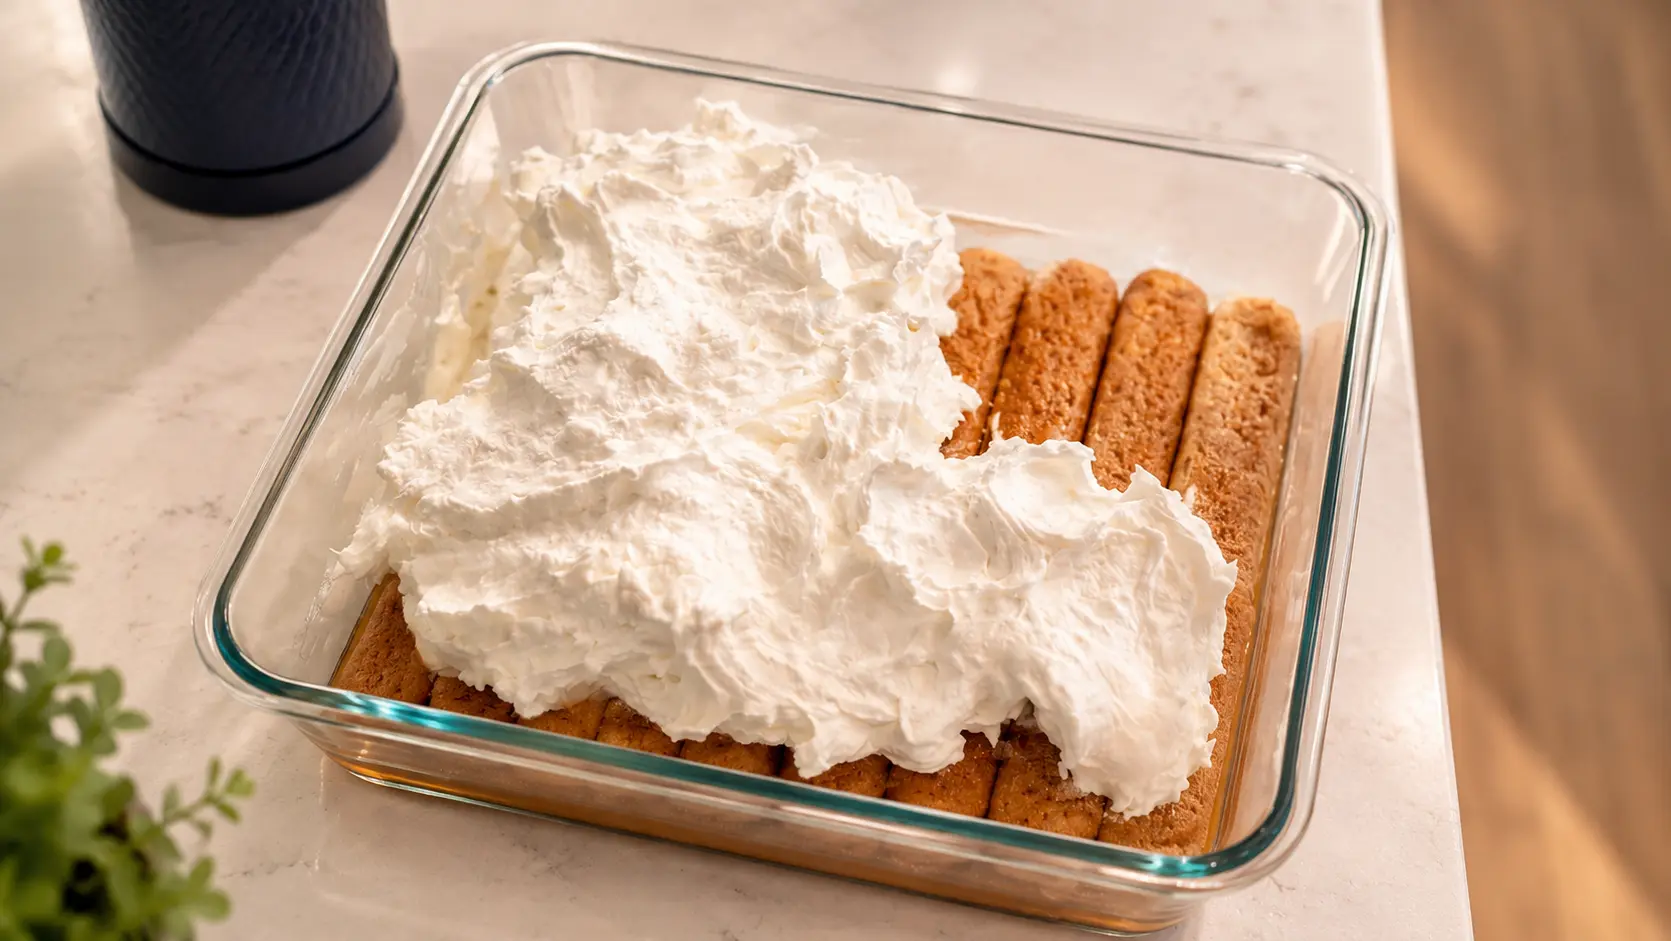
Step 5: Add the Cream Layer
Take your Cool Whip and cream cheese mixture and spread a layer over the lady fingers.
Nice and smooth.
Look at you.
Layering desserts like a professional.
Step 6: Build the Second Layer
Repeat the process:
- Dip lady fingers in coffee
- Stack them on top of the cream layer
Boom.
Another layer.
Already this dessert looks like it belongs in a bakery window.
Meanwhile your actual effort level is somewhere around opening a bag of chips.
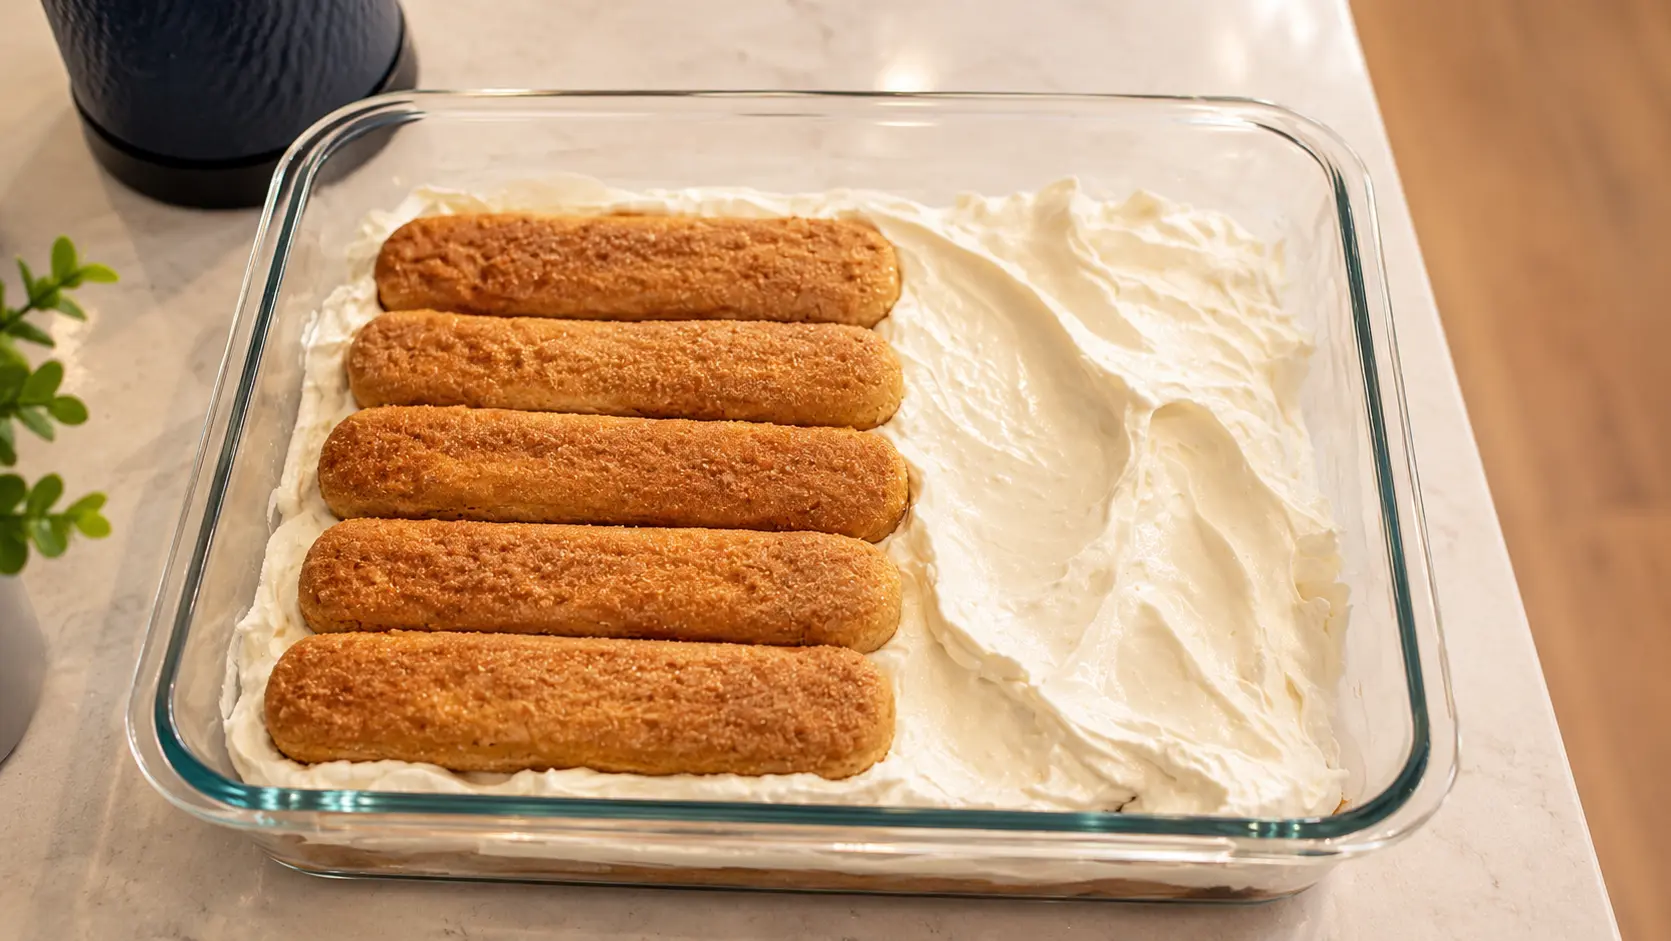
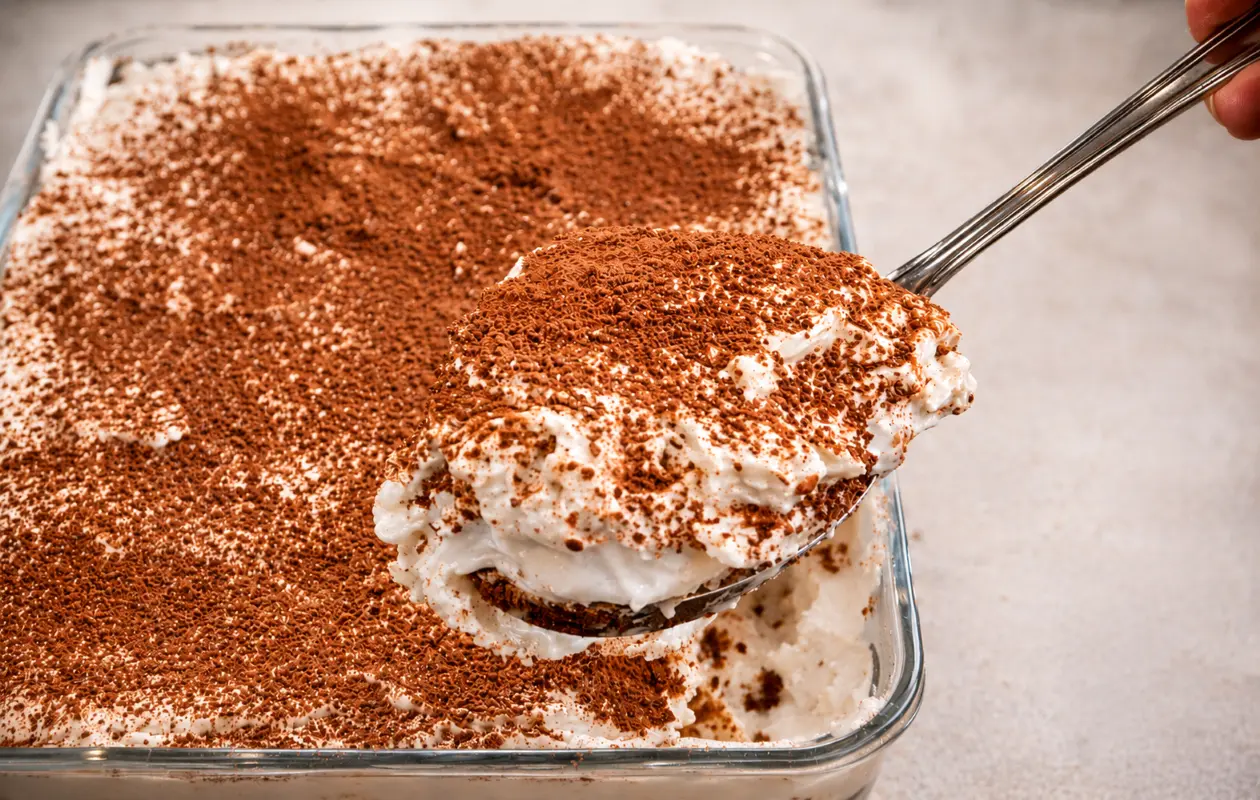
Professional food photography close-up of a partially assembled tiramisu in a clear glass baking dish. A smooth layer of mascarpone cream is spread across coffee-soaked ladyfinger cookies, while a second layer of golden-brown ladyfingers is neatly arranged on top. The dessert sits on a light marble countertop with soft natural lighting that highlights the creamy texture, crisp cookie details, and clean glass edges, creating an elegant, bakery-quality presentation.
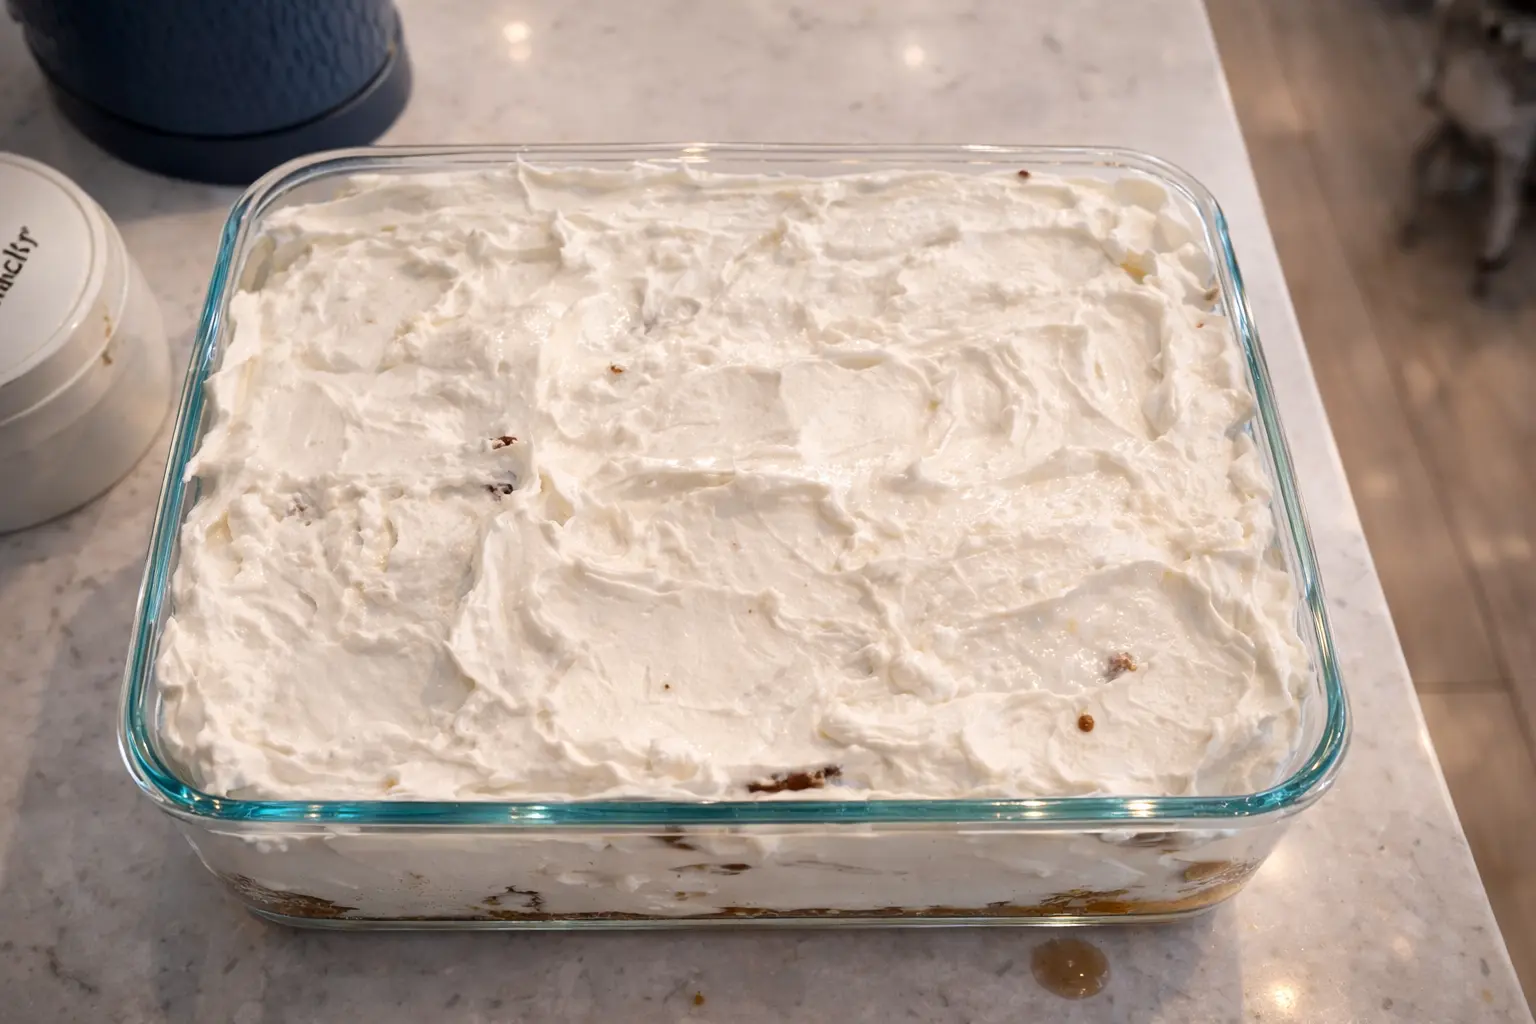
Step 7: Add More Cream
Spread another layer of the cream cheese and Cool Whip mixture.
At this point the dessert starts looking very fancy.
This is the moment where you realize:
"I could absolutely pretend this took hours."
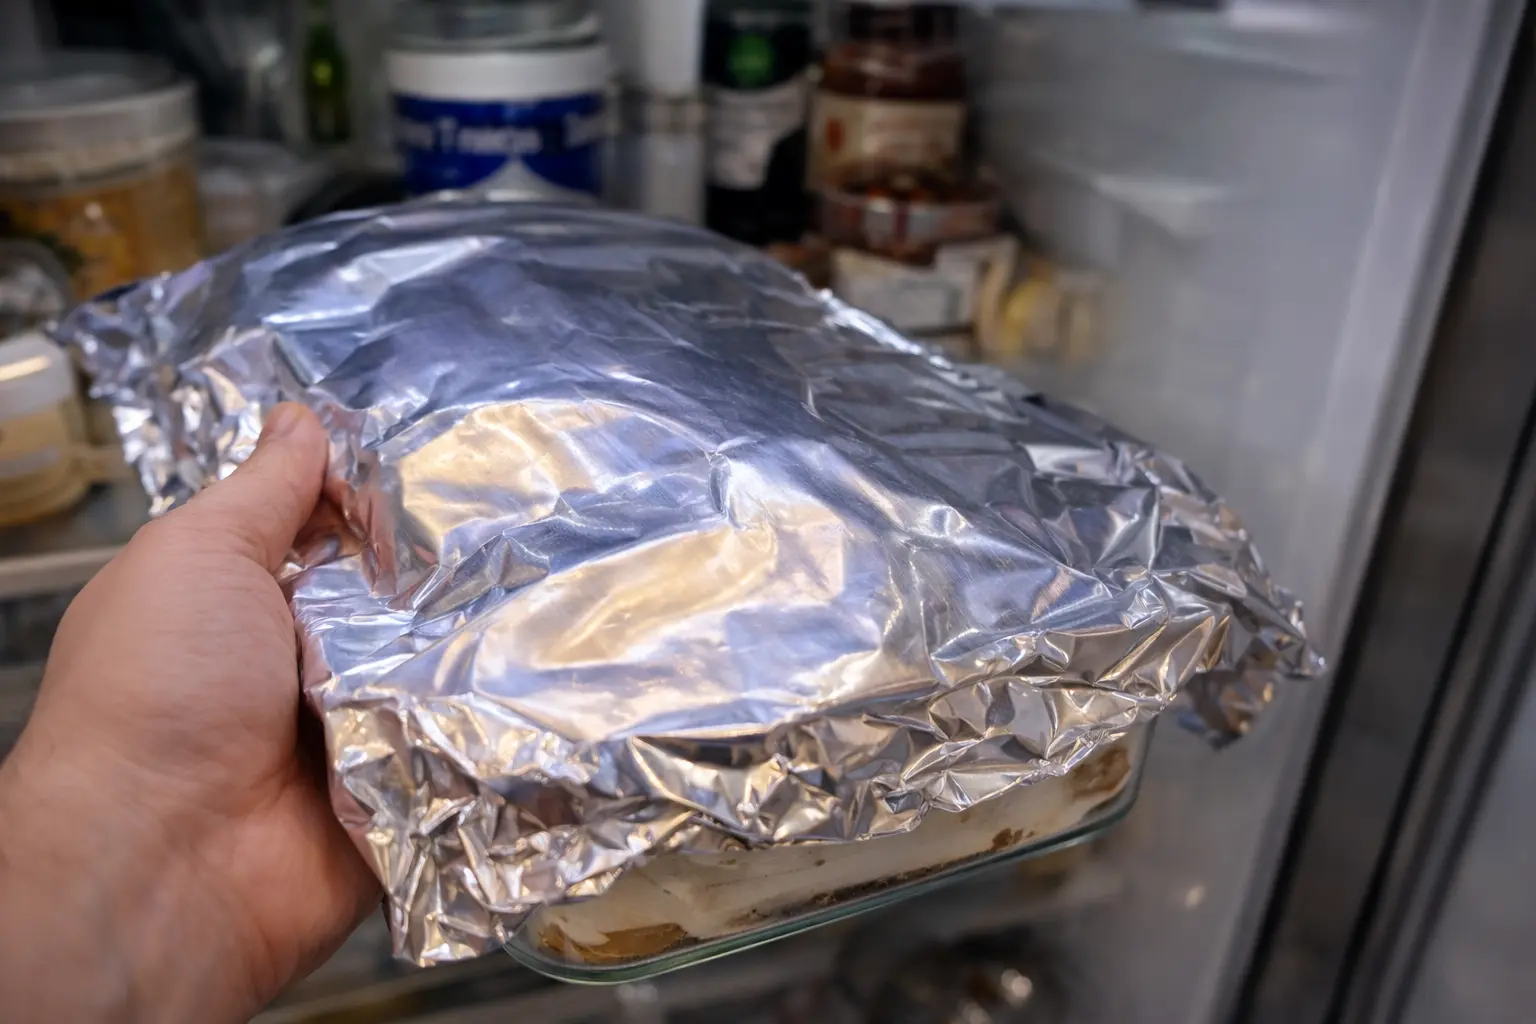
Step 8: Refrigerate
Now place the tiramisu in the refrigerator.
Let it chill for 4 hours.
This is the hardest step because patience is required.
But the chilling time lets everything come together perfectly.
The lady fingers soften, the flavors blend, and the dessert becomes creamy heaven.
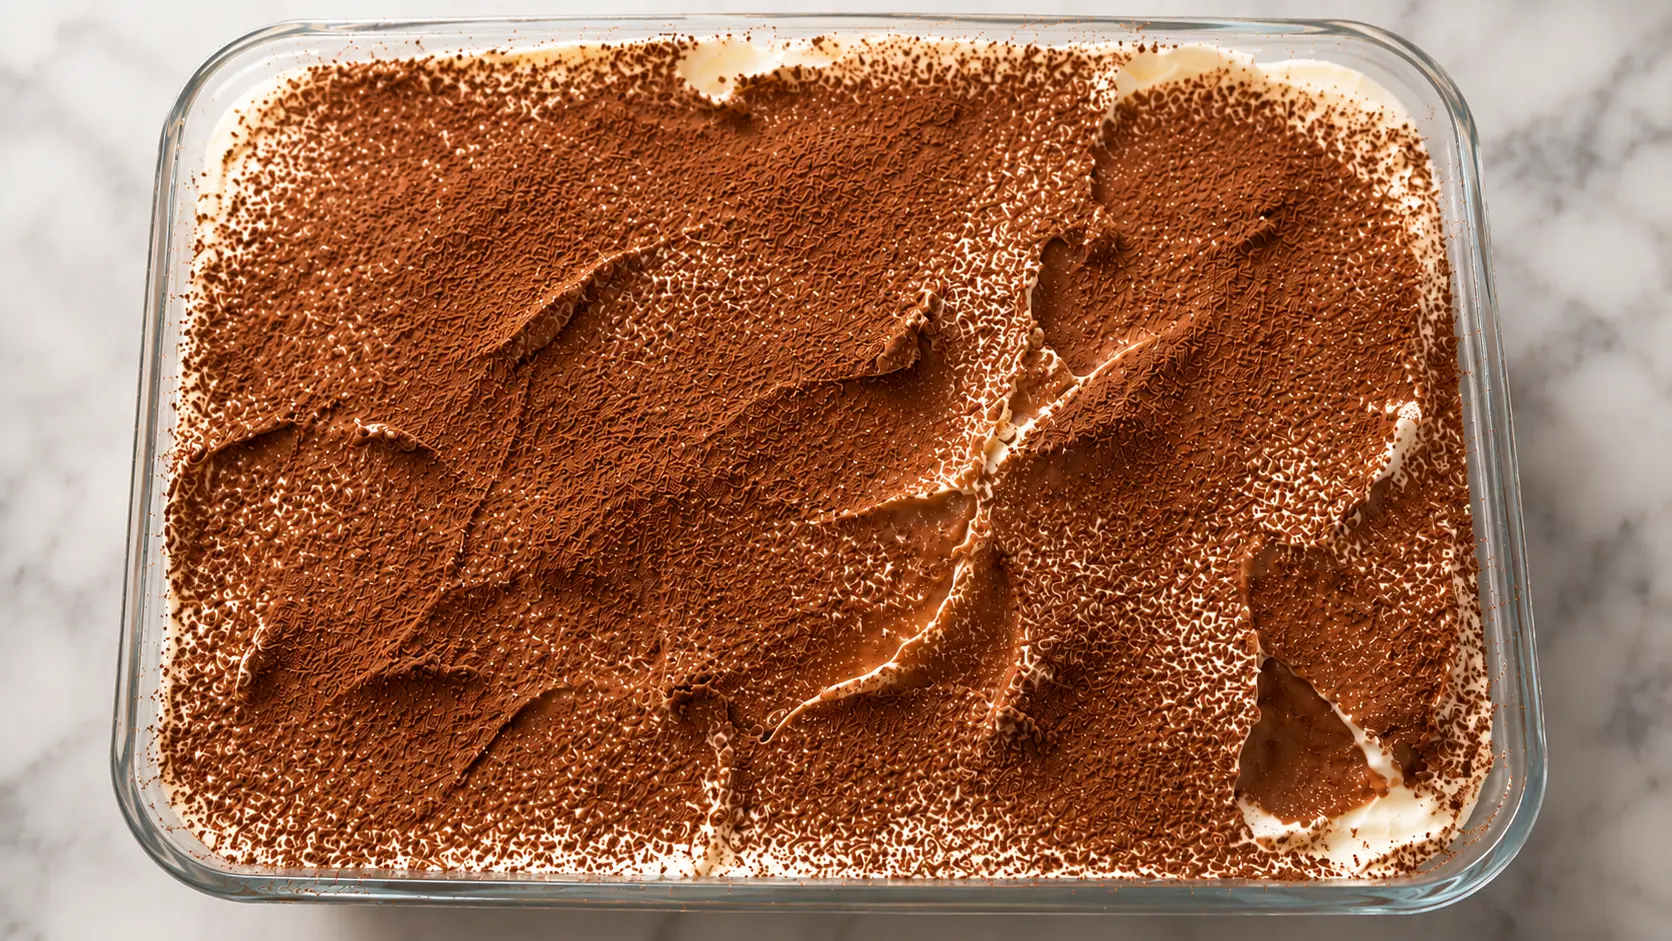
Step 9: The Final Touch
After 4 hours, take the tiramisu out of the refrigerator.
Grab some cocoa powder.
Sprinkle it across the top.
Suddenly your easy dessert now looks like it came from a professional pastry shop.
And you did almost nothing.
Beautiful.
.webp)
Tips to Make This Recipe Even Better
Even though this recipe is already easy, here are some ways to improve it.
Use strong coffee
A stronger coffee gives the tiramisu more flavor.
Don't over-soak the lady fingers
A quick dip is perfect. Too long and they will fall apart.
Chill longer if possible
Four hours is great, but overnight is even better.
Spread layers evenly
Nice layers make the dessert look beautiful when you slice it.
And honestly?
Pretty food just tastes better.
My Thoughts About This Recipe

I love recipes like this.
Not just because they taste amazing, but because they remind me of something important:
Life doesn’t always have to be complicated.
People complicate desserts.
People complicate life.
But sometimes the best things are the simplest.
Five ingredients.
Ten minutes of work.
Four hours of patience.
And suddenly you have a dessert that looks like it came from a fancy Italian restaurant.
Meanwhile, you know the truth.
You barely did anything.
And honestly?
That might be the sweetest part.
Frequently Asked Questions
1. Can I make this tiramisu ahead of time?
Yes! It actually tastes better when chilled longer.
2. Do I have to use Cool Whip?
The recipe uses Cool Whip because it makes the dessert very easy.
3. Can I skip the cream cheese?
The cream cheese adds richness and helps thicken the filling.
4. Why do you dip the lady fingers in coffee?
Coffee gives tiramisu its classic flavor and softens the cookies.
5. How long should I refrigerate the tiramisu?
At least 4 hours.
6. Can I add more layers?
Yes. You can add as many layers as your dish allows.
7. What does cocoa powder do?
It adds a slightly bitter chocolate flavor that balances the sweetness.
8. Why are lady fingers used?
Lady fingers absorb coffee perfectly and create the layered texture.
9. Is this recipe beginner-friendly?
Absolutely. If you can stack things and mix things, you can make this.
10. Why is this recipe so easy?
Because sometimes desserts — like life — should be simple.
And honestly?
We deserve that.


.png)